

How to Grow Microgreens at Home – Beginner’s Guide
- Mar 12
- 4 min read
Microgreens have become one of the fastest-growing segments in urban agriculture and controlled environment farming. These nutrient-dense young vegetable greens are widely used by restaurants, health-conscious consumers, and commercial growers due to their high nutritional value and quick growth cycle.
However, many beginners struggle with inconsistent growth, poor yields, mold issues, and improper environmental conditions when attempting to grow microgreens at home.
The good news is that microgreens are one of the easiest crops to grow indoors when the right process and environmental controls are used. With a structured setup and proper management of temperature, humidity, lighting, and airflow, anyone can grow high-quality microgreens within 7–14 days.
This guide explains how to grow microgreens at home step-by-step, including equipment, growing conditions, common mistakes, and how modern automation technologies are transforming indoor microgreen cultivation.
What Are Microgreens?
Microgreens are young vegetable greens harvested shortly after germination, typically within 7 to 21 days after planting.
They are harvested once the first true leaves appear and are known for their concentrated flavor, vibrant colors, and dense nutrient content.
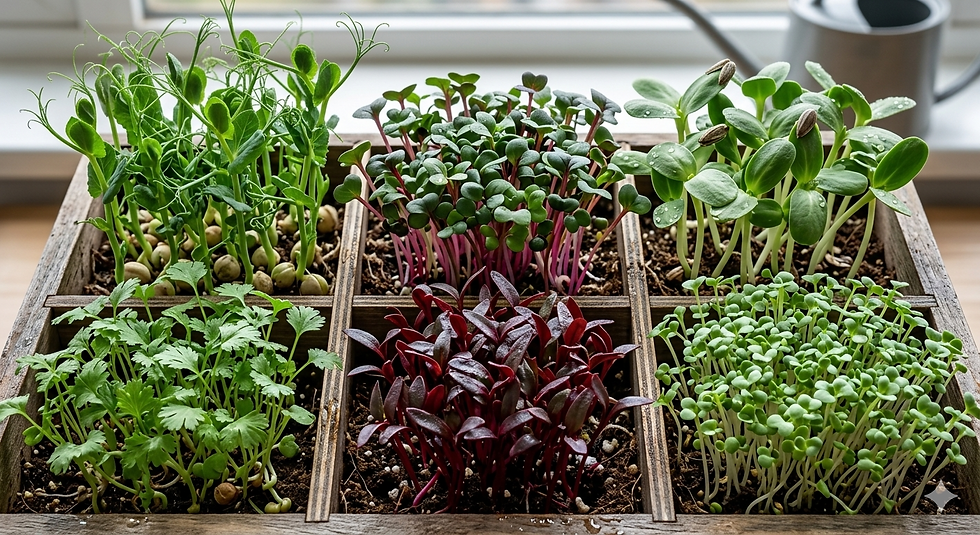
Common microgreens varieties include:
- Broccoli
- Radish
- Sunflower
- Pea shoots
- Mustard
- Basil
- Kale
- Arugula
Microgreens are widely used in:
- Restaurants and fine dining plating
- Health-focused diets and smoothies
- Salads and garnishes
Because they require very little space and grow quickly, microgreens are ideal for home growers, urban farms, and controlled indoor agriculture systems.
Benefits of Growing Microgreens at Home
Growing microgreens at home offers several advantages compared to traditional vegetable cultivation.
1. Rapid Growth Cycle
Most microgreens are ready to harvest within **7–14 days**, making them one of the fastest crops to grow.
2. Minimal Space Requirement
Microgreens can be grown in small trays on shelves, making them suitable for apartments or compact indoor spaces.
3. High Nutritional Density
Microgreens contain high concentrations of vitamins, minerals, and antioxidants compared to mature plants.
4. Low Investment
A basic setup requires only trays, seeds, soil or growing medium, water, and light.
5. Potential Commercial Opportunity
Many small-scale growers sell microgreens to local restaurants, grocery stores, and health-conscious consumers.
Equipment Required to Grow Microgreens at Home
Before starting, it is important to prepare the right tools and materials.
Equipment | Purpose |
Growing trays | Holds the soil and seeds |
Growing medium | cocopeat, or hydroponic mats |
Microgreen seeds | High germination seeds |
LED grow lights | Provide light for indoor growth |
Shelf rack | Vertical growing system |
For beginners, a **basic tray-based soil system** is the easiest method to start.
Step-by-Step Process to Grow Microgreens at Home
Choose the Right Microgreen Seeds
Always use seeds specifically labeled for microgreens or sprouting, as they are untreated and have high germination rates.
Popular beginner-friendly seeds include:
- Radish
- Pea shoots
- Sunflower
- Broccoli
These varieties grow quickly and are highly tolerant of beginner mistakes.
Step 2: Prepare the Growing Tray
Fill the tray with about **1–2 inches of growing medium** such as:
- Cocopeat
- Hemp growing mats
Level the surface and lightly moisten the soil before sowing seeds.
Step 3: Sow the Seeds
Spread seeds evenly across the tray surface.
Key points:
- Avoid overcrowding
- Lightly press seeds into the soil
Most microgreens do not require deep planting.
---
Step 4: Water the Seeds
Use a spray bottle to gently mist the tray.
Important watering tips:
- Keep soil moist but not waterlogged
- Avoid strong water flow
- Water once or twice daily depending on humidity
Excess water can cause mold growth, which is a common beginner problem.
Step 5: Maintain Proper Growing Conditions
Microgreens grow best under controlled environmental conditions.
Parameter | Ideal Range |
Temperature | 18°C – 24°C |
Humidity | 40% – 60% |
Light | 12–16 hours per day |
Airflow | Moderate ventilation |
Indoor growers often use LED grow lights and small fans to maintain these conditions.
Inconsistent environmental conditions are one of the biggest reasons for crop failure in indoor farming.
Step 6: Provide Light After Germination
After seeds germinate (usually 2–3 days), expose the trays to light.
Options include:
- Natural sunlight near windows
- LED grow lights
- Full-spectrum horticulture lights
Adequate light ensures:
- Strong stem development
- Vibrant leaf color
- Higher nutrient concentration
Step 7: Harvest Microgreens
Microgreens are ready for harvest once they reach 2–3 inches in height.
Use clean scissors to cut the greens just above the soil surface.
Harvest tips:
- Harvest in the morning for best freshness
- Wash gently before consumption
- Store in airtight containers in the refrigerator
Common Mistakes Beginners Make
Many beginners experience issues when growing microgreens. These problems usually occur due to environmental control failures.
Overwatering
Too much water leads to fungal growth and root rot.
Poor Air Circulation
Stagnant air increases the chances of mold development.
Insufficient Lighting
Weak light results in thin, elongated stems.
Temperature Fluctuations
Large temperature variations slow down plant growth.
These issues become more noticeable when growers attempt to scale production beyond a few trays.
FAQs
What are the easiest microgreens to grow at home?
Radish, sunflower, pea shoots, and broccoli microgreens are among the easiest varieties for beginners due to their high germination rate and fast growth cycle.
How long does it take to grow microgreens?
Most microgreens are ready to harvest within 7 to 14 days, depending on the variety and environmental conditions.
Do microgreens require sunlight?
Microgreens need light for proper growth, but they can be grown using LED grow lights in indoor environments.
Can microgreens be grown year-round?
Yes. With controlled temperature, humidity, and lighting, microgreens can be grown indoors throughout the year.
Is microgreens farming profitable?
Microgreens can be profitable for small-scale urban growers supplying restaurants and local markets due to their fast crop cycles and high market value.


Comments